We call it technical automation of process, before I explain it in more detail, we first need to understand what are most important elements that we need to implement to convert a simple wordpress website into fully infusionsoft integrated membership website.
Following are main tools that we need to have in hands in order to automate this technical aspect of the business.
- InfusionSoft CRM
- WordPress Website
- Kaya Pro Soft Application for InfusionSoft
Following is list of functionalities that we need to automate
- Add/Edit/Remove Membership levels
- Creating password protected Membership Area on WordPress
- An InfusionSoft integrated mobile responsive checkout page to charge membership fee
- On successful payment, adding these customers in their purchased membership
- An automatic way to send username and password to members on successful payment
If you don’t have your copies of InfusionSoft or kaya pro soft, you can get one from their website.
We will complete a membership site in three steps
- Creating membership and password protected area on the wordpress
- Creating mobile friendly checkout page to process membership payment
- Sending membership login credentials to members with login URL
Creating membership and password protected area on the wordpress
Here is step-by-step process to achieve this
Step 1/5
Login to your kaya pro soft application -> click on Subscription -> Manage Subscription
On the top right corner click Add button
You will see Add subscription form
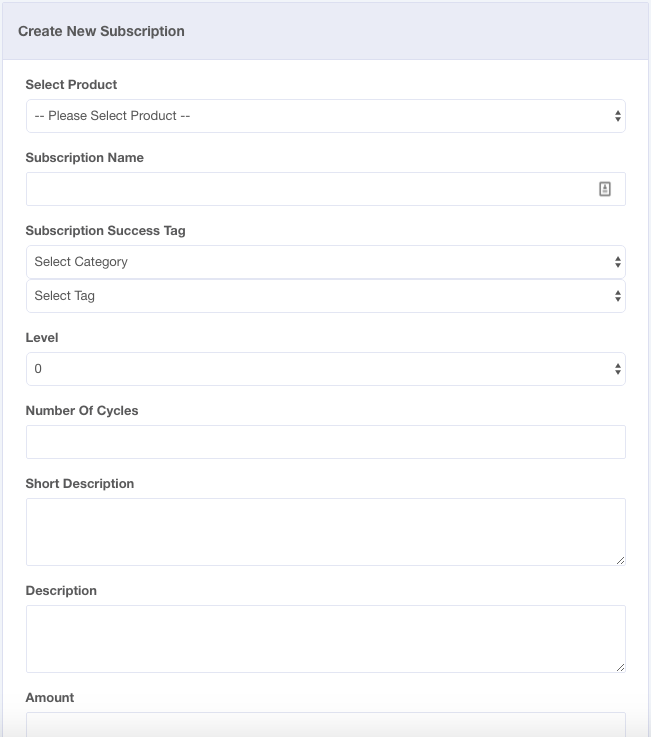
Provide your membership details here, including cost, period, number of cycle, one time payment option or trial period.
The most important parameter here is “Subscription Success Tag” this is unique identifier for each membership, what does it mean? I will explain it shortly. Once you will add all parameters for new membership, press submit button.
Step 2/5
Now login to your wordpress Site, if you have not installed kaya pro Soft plugin on your wordpress yet, you can install and connect it with Kaya Pro Soft.
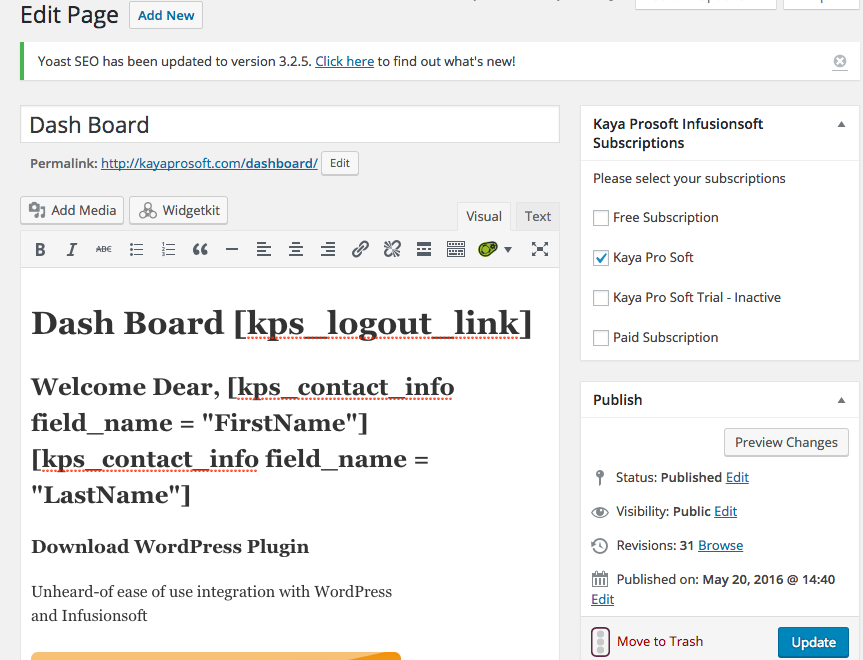
First click on pages and add a new page that you want to make a password protected membership page, and on the right panel you will see new membership that you have created in Kaya Pro Soft, once you are done with editing the page, check the membership you want to add this page to
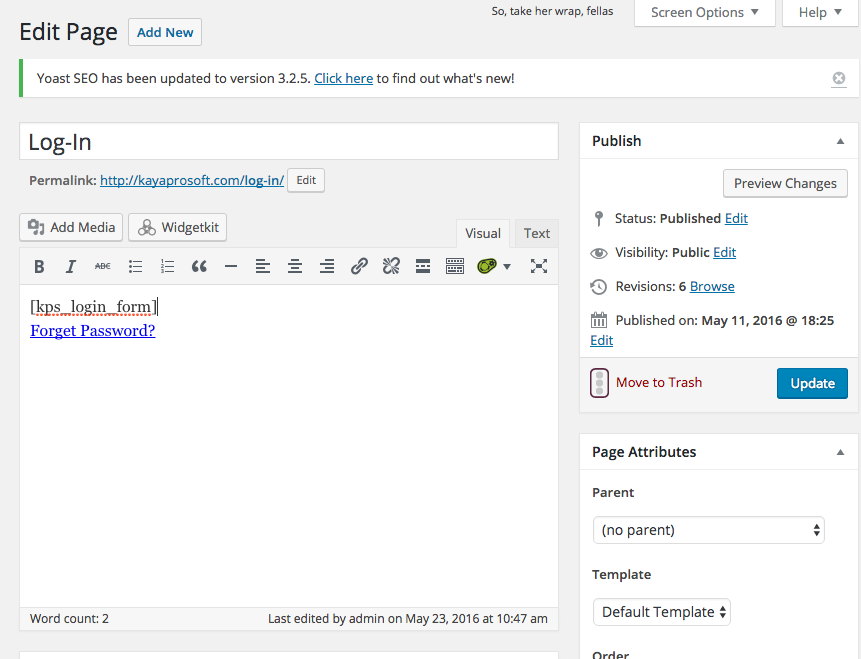
Now add another page, and name it “Membership Login” and put [kps_login_form]
Short code to display login form on this page
This page will serve as login page to access membership pages, now go in the Kaya Pro Soft menu item on the left menu and click “Manage URL” there you will see list of created memberships, and select after login page for each membership, which will identify the page, that each member will see after login.
Step 3/5
At this point, you have created and setup memberships, and now you need to integrate your payments gateways, login to your Kaya Pro Soft application and click on eCommerce menu item and then Payment Integration
You will see PayPal, Stripe, Authorize.net and InfusionSoft Payment Methods
Select your payment method you want to use to charge recurring payments, in this example I will select PayPal, you will give your API credentials of PayPal and will hit save button
Step 4/5
Once you have integrated your payment method, now its time to create InfusionSoft integrated mobile responsive checkout page, in the Kaya Pro Soft click eCommerce->Checkout Pages
Click Add new Form
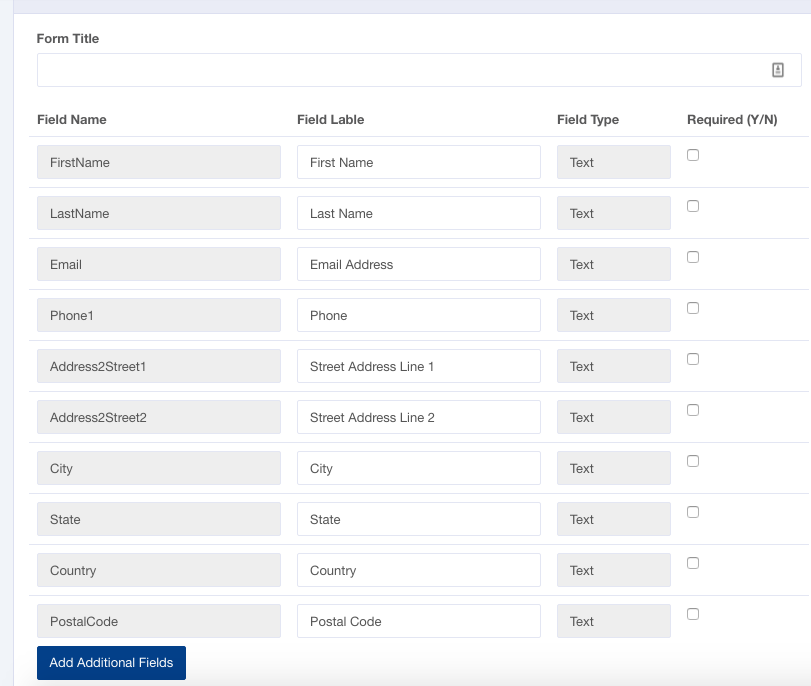
You will see default fields that you want to display on your checkout page, if you want to make a field required, you can mark it require by clicking on the right side check box, also you can add additional custom fields from InfusionSoft in the checkout page, for example if you have “How did you hear about us” custom dropdown in the InfusionSoft and you want to know where each customer found you, can you add that custom dropdown by click Add additional Fields button.
Once you done click Save button
Next step and is to go back to the list of all checkout forms, and click on

And click of Action Button, you will see dropdown, select Assign Subscription. You will see
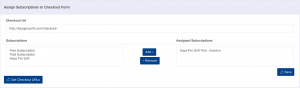
Select the subscription that you want to charge through this checkout page, once you will select and press Add-> button, now keep this window open and go back to your wordpress admin, and create a new page “Checkout”, and once that page is created, copy and paste checkout page URL from wordpress in to Checkout URL field in the above picture
Now save this window and now again click on the action button of the same checkout form you created in Kaya Pro Soft, and select “Get HTML Code” option, there you will see HTML Code
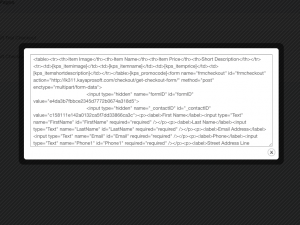
Copy this HTML code and paste it in the checkout page you have created in wordpress, and that’s it, you checkout page is ready to go
Step 5/5
Final Step is to create a campaign in InfusionSoft which will Generate username and password on successful payment
Here is how it will look like

You can see in detail how you can create this campaign in the demo video given below.
That is it, did you see how easily with 5 steps, how we have created a fully functional membership site with e-commerce and mobile checkout pages.